Today I baked my 3rd attempt at the 70% hydration loaf. Like the first time I did this as a no knead. I’m not going to go into all the details of what I did just highlight the changes.
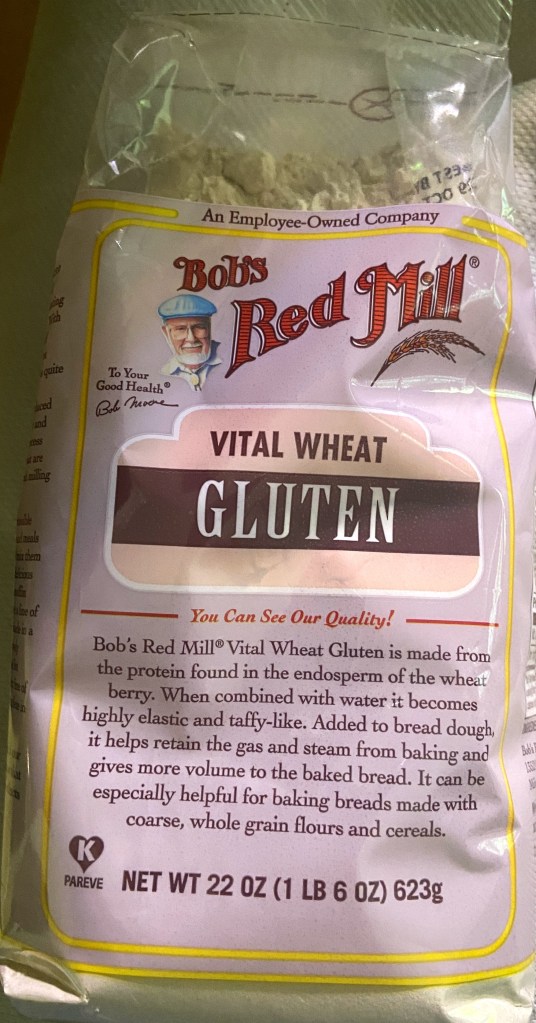
Vital Wheat Gluten
The first change I made (and I made 2 changes) was to replace 15g of the flour with vital wheat gluten. Gluten is the protein that makes yeast breads possible. It creates the network of fibers that both stretch when as the yeast releases gas and trap the gas inside. Since I haven’t been able to get bread flour I’ve been using all-purpose which has much less protein. By subbing 3g of flour with vital wheat gluten I’ve brought the protein levels up to what a high protein bread flour would have.
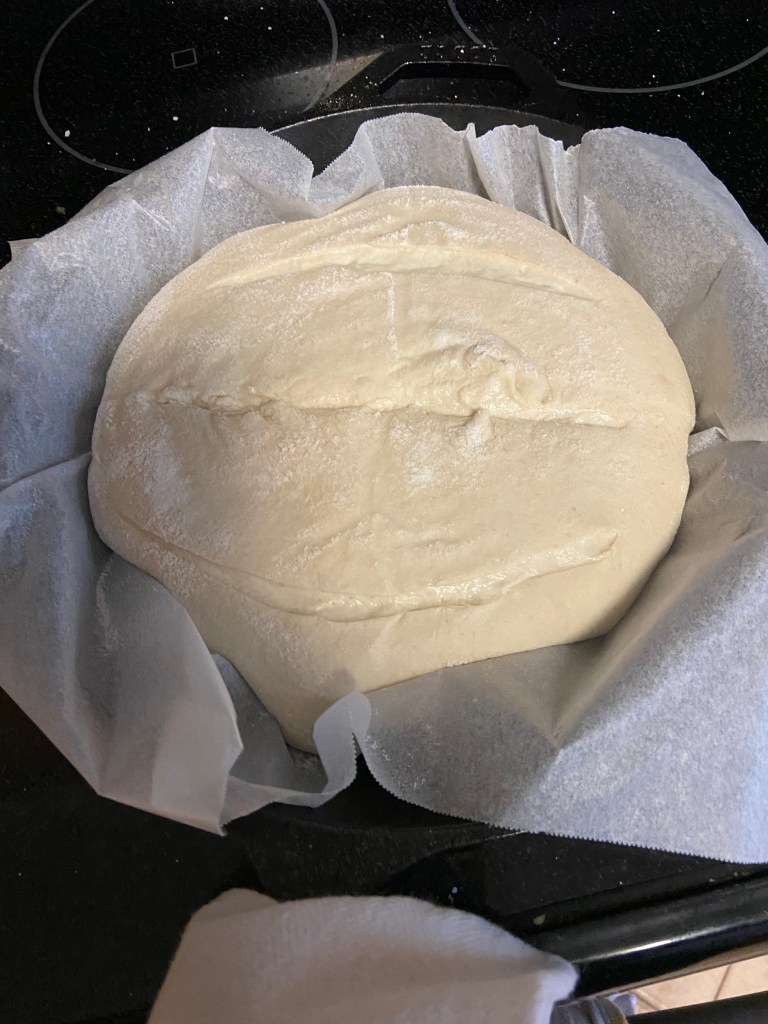
I added the gluten in the first, levain, phase of making the dough. I didn’t notice anything different until it was time to shape the dough. Shaping the dough was much easier this time and I was very happy with the outcome.
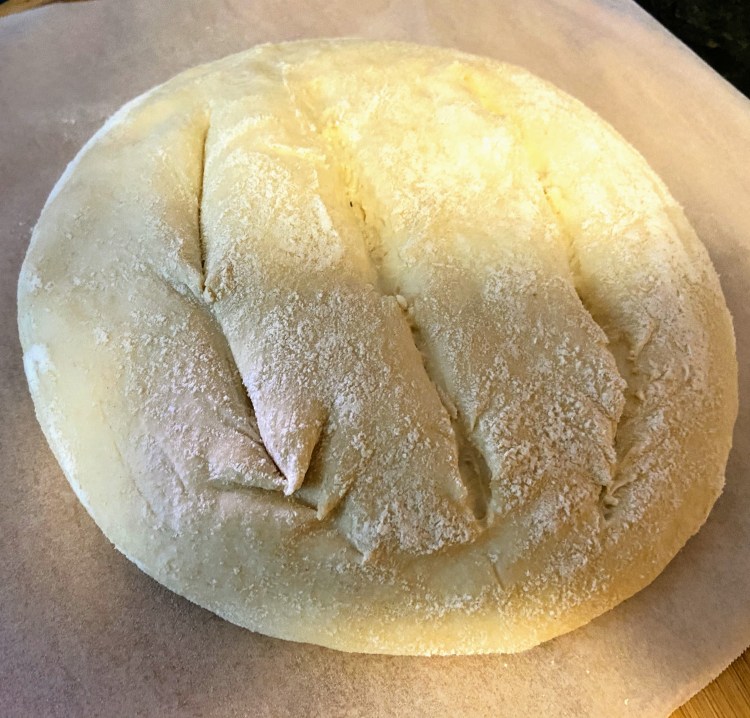
Right before it went in the oven.
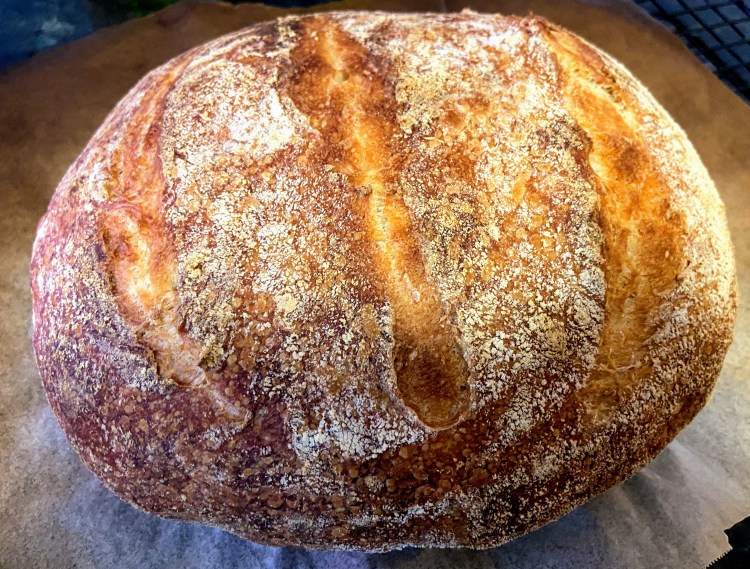
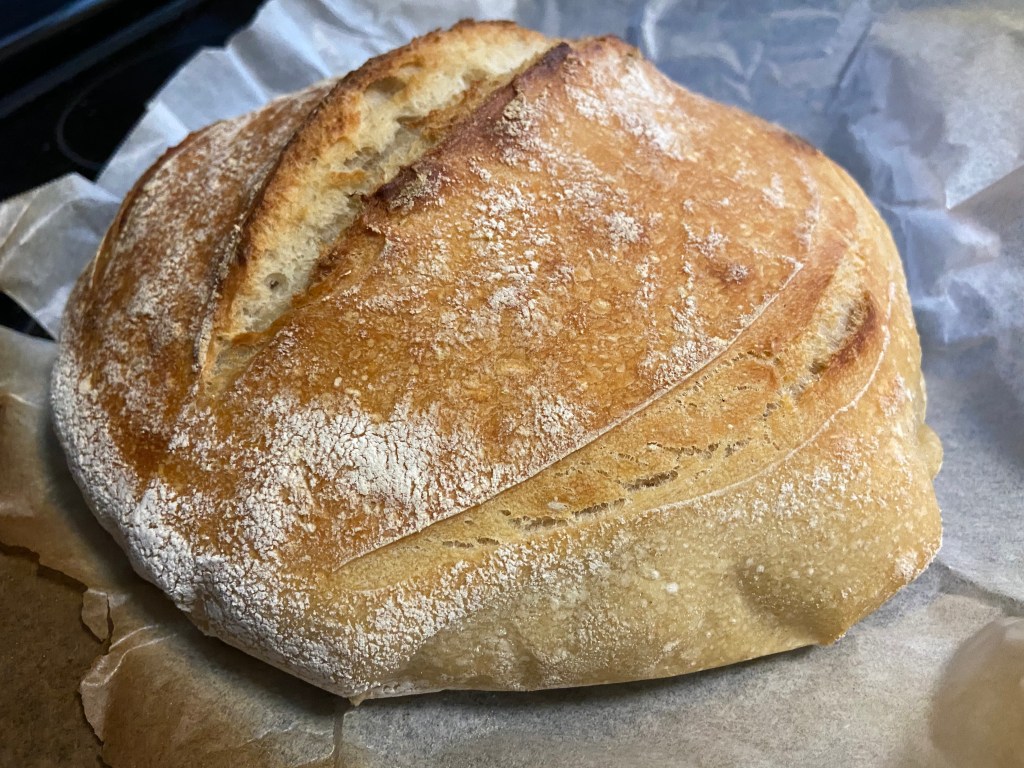
The second change I made was in the baking itself. This was actually 2 changes. The first was I baked it on a pizza stone. The second part was the temperature – I started by preheating the oven to 500°F/260°C for 1 hour with the pizza stone in it. I put the dough and water for steam in and closed the door for 20 minutes. After 20 minutes I took out the water pan, lowered the temperature to 450°F/230°C and left it in for another 15 minutes before taking it out to cool.
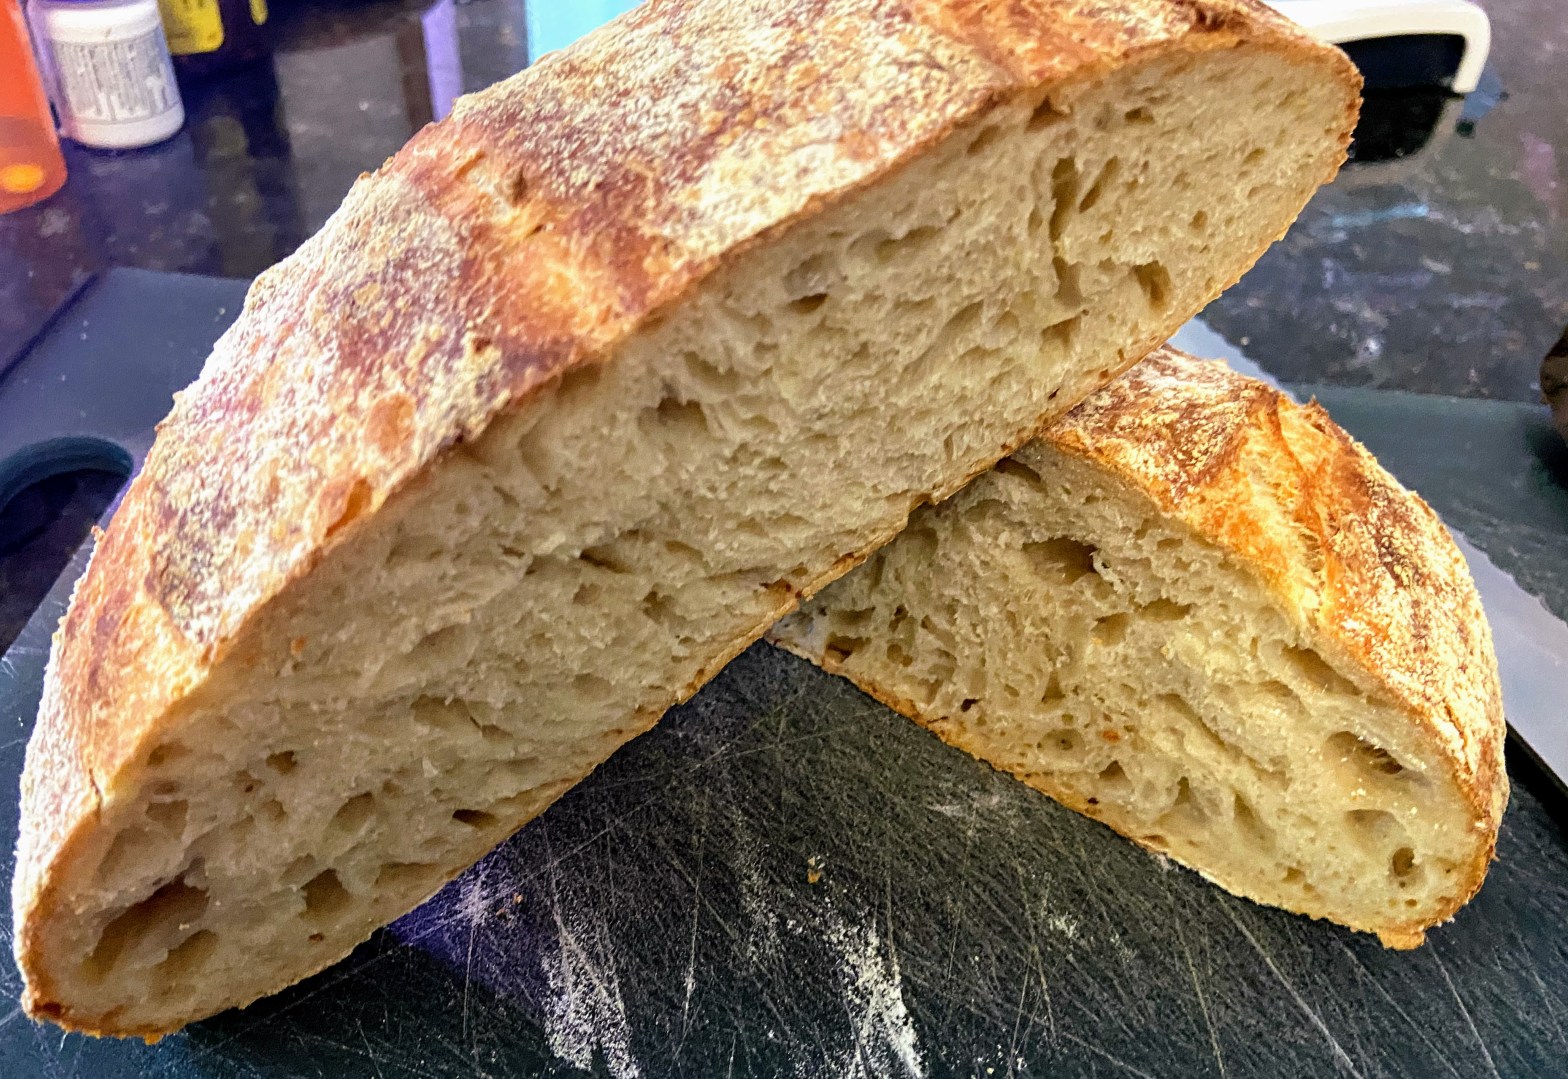
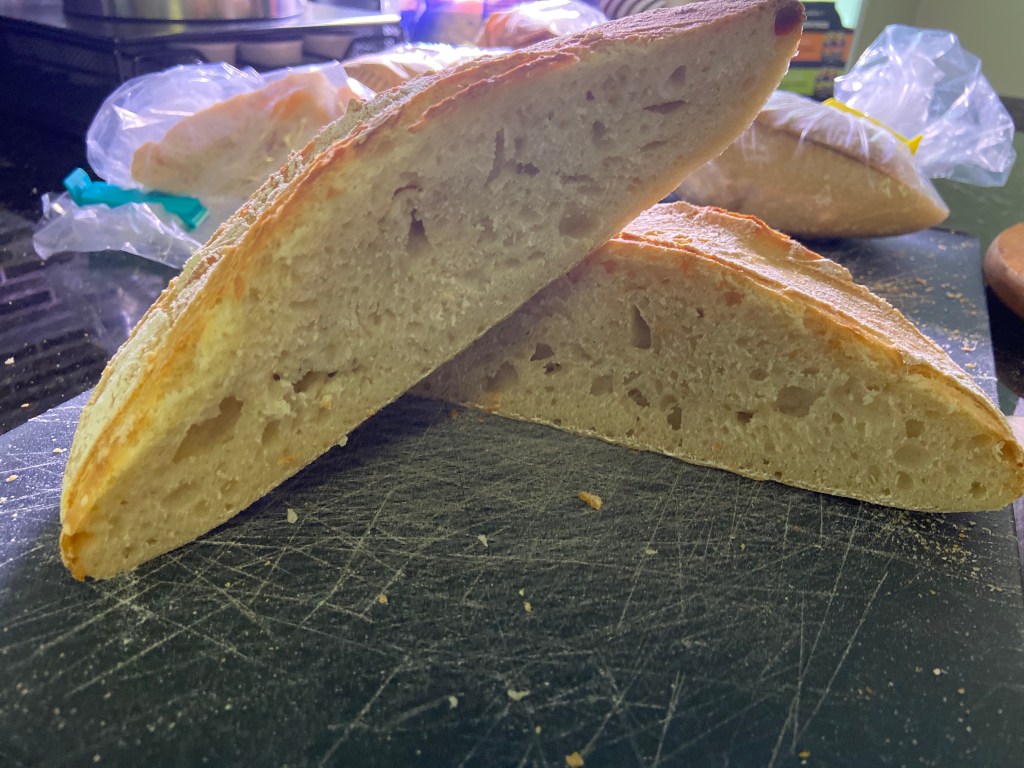
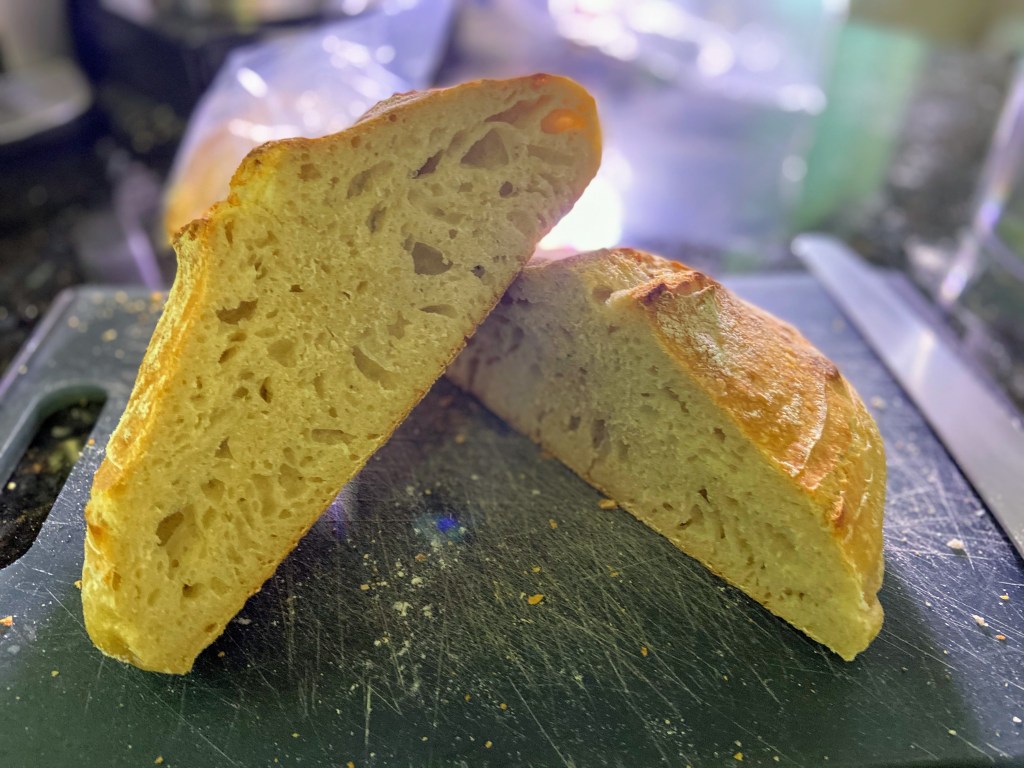
The cross section.=
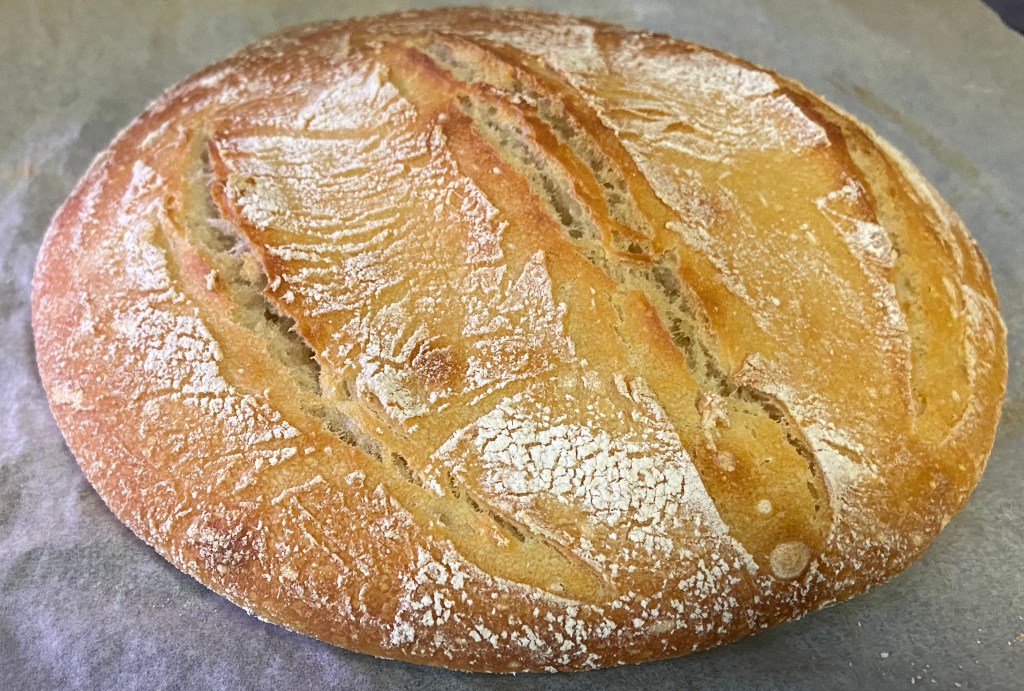
Two hours later I cut into it. The first thing I noticed was that it rose much better. The crumb was more consistent with lots of nice sized holes well distributed through the loaf. The taste was what I expected from the previous attempts, a very mild sourdough flavor. Most importantly is the texture, it was still a drop chewy but not too chewy.
I’m going to try making a kneaded version of this and, when I can get it, I’ll try making it with bread flour. In any case, I think I have a success here.
In my family Wednesday means pizza. Now I’m sure you’re asking yourself, “Today’s Friday. If Wednesday means pizza why wait two days?” The answer to this is simple, Wednesday was my son’s birthday so we juggled things around this week and did pizza Wednesday on Thursday. And I was too exhausted yesterday evening to string two sentences together so I put off writing this post till morning.
As you might imagine I like to make my own pizza. Mainly because I grew up in New York and I know from pizza and getting good pizza is hard. None of the chains do good pizza – they optimize for speed and consistency, not quality. Most of the pizza places I’ve eaten from do a crust that’s too thick to get crispy. There are some that do a decent job – there is a place we order from – but nothing beats pizza fresh out of the oven.
Before I get too far along I will admit that I’m too lazy to make my own sauce. Not just too lazy, pizza sauce is one of the things I’m not very good at making. I’ve nailed it once or twice through the years but never in a repeatable fashion. More often than not I end up with a freezer full of containers of sauce that are OK to use but not just right. So I cheat. I use jarred pizza sauce. And that’s OK.
Now that we’ve gotten the preliminaries out of the way we can talk about what really matters. Dough!
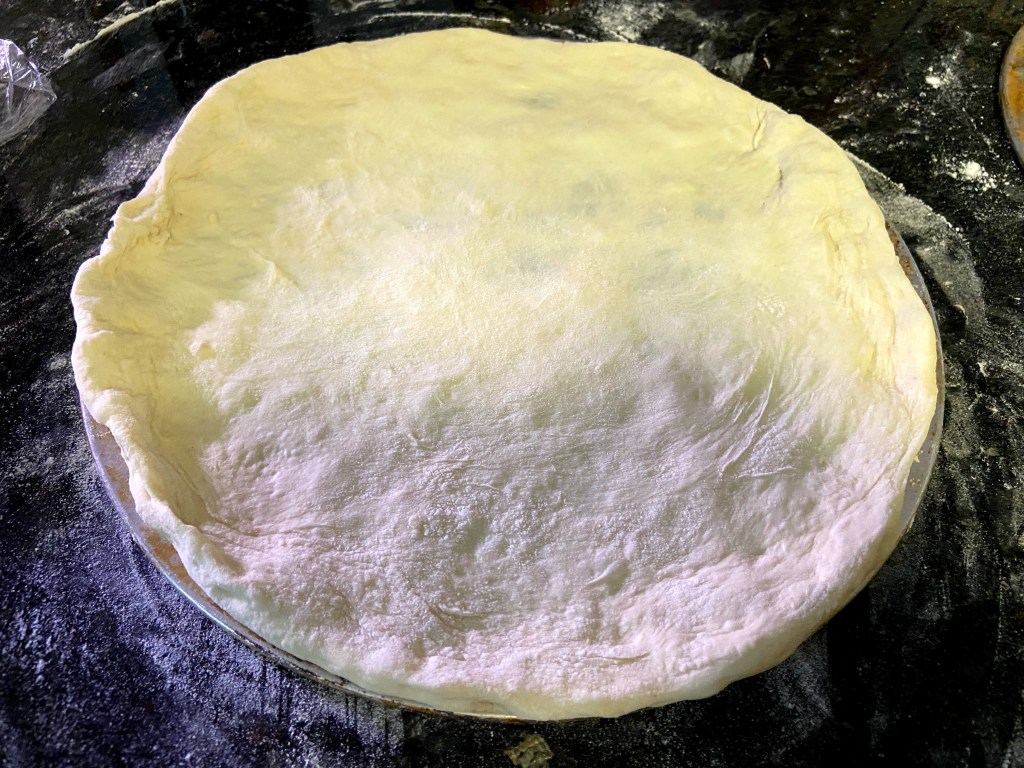
The dough for one pizza ready to be flattened, topped and baked.
So the ingredients and preparation for this dough come from Patrick Ryan’s Sourdough Pizza Recipe. You take all the ingredients and mix them to a dough and shove it in the fridge for ~24 hours. About 90 minutes before you want to bake, take the dough out and bring it up to room temperature.
About 60 minutes before you want to bake slide your pizza stone into the oven and pump it up as high as it will go (mine goes up to 550°F/285°C). If you don’t have a pizza stone use a baking tray or baking pan upside down. The idea is to have a flat surface that you can slide the pizza onto and pull it off of. (I’ll do a post on Pizza Hardware later and talk about the benefits of pizza stones, why pizza peels are worth the money, and other related issues. But that’s a different blog post.) Just remember that the surface you’re putting the pizza on needs to be larger than the pizza.
After the dough has been out of the fridge for an hour or so (I usually give it about 90 minutes) knead it for about a minute. What I’ve noticed is that when I take the dough out of the fridge (and I apologize for not thinking to take a picture of it at this point) it isn’t quite as homogenous as I would like it to be and there are spots with congealed oil and kneading serves 2 purposes – first it mixes that oil in and creates a much more homogenous dough, second it deflates the dough. Once you’ve kneaded it you should have about 1,120g of dough (I say about because some will stick in the bowl and maybe on the counter no matter how well you flour it.) Split the dough into equal blobs, form them into balls, and let rest, covered, at room temperature for 30 minutes.
I usually do 4 280g balls and get 12″ pizzas from them. I’ve done 6 10″ pizzas from this recipe (and that’s what it suggests) but I’ve found that less is more in this case. When I do 6 10″ pizzas my family will eat it all and still be hungry – there’s less room for cheese and toppings on 6 10″ pizzas. Also, the more pizzas I’m baking the less time I’m spending with my family.
All flat and ready for sauce, cheese, and toppings.
Once those dough balls have rested you need to flatten them out. I will not do a video showing how I do it because there are so many good ones out there by people who are much better at it than I am. Suffice it to say that through hard work and perseverance (OK, it’s not really that hard) I took that dough ball and made it into a pizza crust. If you take a good look at the picture you’ll see that the crust is pretty thin in the middle and much thicker around the edge. This is intentional – this gives us a crust that’s crispy in the middle and bread like around the edges. If we wanted a uniform crust (and this is one of my big problems with a lot of pizza places) we could just use a rolling pin.
Sauced cheesed and ready for the oven.
Once we have our dough flattened it’s time to top it. We want a pretty thin layer of sauce. The sauce is there for flavor but we want a crispy crust so putting too much on it can make the dough soggy. For my 12″ pizza I use 2-3 soup spoons of sauce. Once you have your sauce on sprinkle on the cheese. Again, you don’t need to be heavy handed with the cheese and you don’t need to cover every square inch of the crust – the cheese will melt and spread itself out. One caveat on the cheese, if you’re using fresh mozzarella it doesn’t spread as much as the shredded, you might want to consider doing a mixture of both. If you want to put other toppings on now is the time. When I do toppings other than cheese I usually sprinkle a little bit more cheese on top of them.
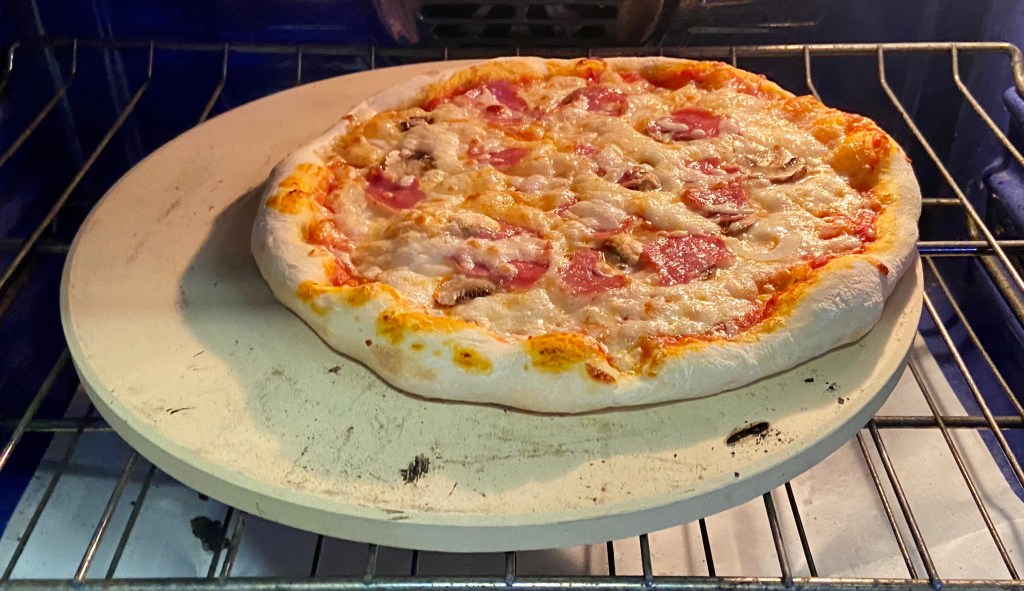
Time to bake!
We have our pizza flattened, sauced, cheesed, and topped. Now it’s time to bake. At this point our oven should be as hot as it’s going to get (remember, we turned it on an hour or so ago to as high as it would let us.) Gently put the pizza on the pizza stone (or alternative from above) and set a time for 9 minutes. I don’t know if you noticed but I have a pizza screen under the dough while I’m working to make it easier to get the pizza in the oven and moved from point A to point B. If you’re using one of these devices I would recommend taking it out about halfway through the cooking process and letting the pizza finish on the stone by itself.
The family got to it before I could get a picture!
Once you take it out of the oven it’s time to cut, eat end enjoy!
Yesterday I made the dough I planned on. I did a 70% hydration dough just like I did in my first solo attempt but this time I kneaded it. OK. The stand mixer kneaded it. But that doesn’t matter. I finally got the dough I was looking for.
The dough in the oven. The baking pan below is filled with boiling water to put steam in the oven.
This morning I got up and baked it. I put it in the 450°F/230°C oven for 35 minutes on a baking sheet and let it bake.
Fresh out of the oven
My hope was that kneading it would build up the gluten and help it rise up. Nope. If anything I think it spread out even more. To be fair I might want to retry both methods and bake it the way I did the goof – put it in a hot cast iron skillet at a higher initial temperature. Or a pizza stone (the new one arrived yesterday!) I’m not sure if I want to try this or try something completely different. Leave a comment and let me know what you’d like to see me try.
The crumb.
Fast forward a few hours. I cut into the loaf and see a crumb that looks familiar. I tried the bread with just some butter and was happy with the level of sourness (a little less than I like but what the rest of my family prefers.) I was not so happy with the crumb. Just like the previous attempt this was a denser bread than I wanted. I’m wondering if I can get the bread I want at this hydration level. Maybe I’ll drop to a lower hydration until I can get bread flour again – the AP flour I’ve been using might not be up for the task.
This morning I took the dough that I made when I goofed out of the fridge and baked it.
The dough getting ready to go in the oven. It’s scored and sitting in a 10″ Lodge cast iron skillet.
I followed the advice of my friend Allaya of Stuff You Knead fame and baked it in a cast iron skillet (I used a 10″ Lodge skillet since I was using a 9″ proofing basket) that I had heated up to 500°F. I baked it at 500°F for 20 minutes with a baking pan full of boiling water for the steam and then I lowered the temperature to 450°F for another 10 minutes and removed the water pan.
The bread when it came out of the oven.
I then descended to my home-office to work while salivating over the thought of how yummy the bread would be. A few hours later I came up and cut into the bread (now fully cooled) and tried it.
The inside of the bread.
I had one slice of it with butter and I was mostly happy with how it turned out. It had a bit more sour flavor then the one I made in my first attempt but it wasn’t pronounced. I wouldn’t have minded a bit more sour flavor but I was OK with this (and my kids were too.) I think it was a bit denser than I would have liked which I’m chalking up to not enough starter for the flour because of the goof. We’ll find out if that theory is right when I make the bread I had planned on.
The one thing I am definitely happier about this time is that it rose up and not out. I don’t think that has to do with the skillet as a shaping device because it didn’t hit the edges of it. It’s possible (likely even) that the skillet helped by bringing heat closer to the bottom of it.
The recipe and instructions for this one are:
200g active starter (start of peak time)
543g Unbleached AP Flour
350g Filtered water
15g salt
Mix and knead the dough – I used a stand mixer with the dough hook but you can do it by hand. Just be warned that this is a soft and somewhat sticky dough.
Put the kneaded dough into an oiled bowl and let rest ~3 hours.
Gently deflate by folding the dough. Then shape it and let it proof overnight in the fridge.
About 1 hour before baking take the dough out of the fridge. Preheat the oven to 500°F/260°C with a cast iron skillet in (I used the cast iron skillet because my pizza stone broke last week and the new one I ordered from Amazon hasn’t arrived yet) and a baking pan to hold the water and generate steam.
When the oven and skillet are both hot boil some water (2 cups or so) and put the shaped dough into the skillet (I highly recommend putting parchment paper down and the dough on that), score it, and put it in the oven for 20 minutes. When you’ve put the dough in fill the baking pan with the boiling water (you might want to wait for the water to boil before you deal with the dough.)
After 20 minutes at 500°F the bread is probably still a little pale so drop the temperature to 450°F/230°C and let it bake for at least 10 more minutes or until you’re satisfied with the color.
Let it sit on a cooling rack until fully cooled – 2 to 3 hours – and then enjoy.
The plan was to recreate the 70% hydration loaf I baked yesterday but by kneading the dough rather than folding during its bulk fermentation phase. I already told you earlier about getting Covey Jr. ready (200g of starter from the discard.)
Covey Jr. all ready to go (6 hours after feeding.)
I took Covey Jr., 400g of starter, 12g of salt and 350g of water and put them in the bowl of my stand mixer. The only problem is is that I was supposed to do 250g of water since Covey Jr. already has 100g of water in it. Instead of a 70% hydration dough I started to make a 90% hydration one!
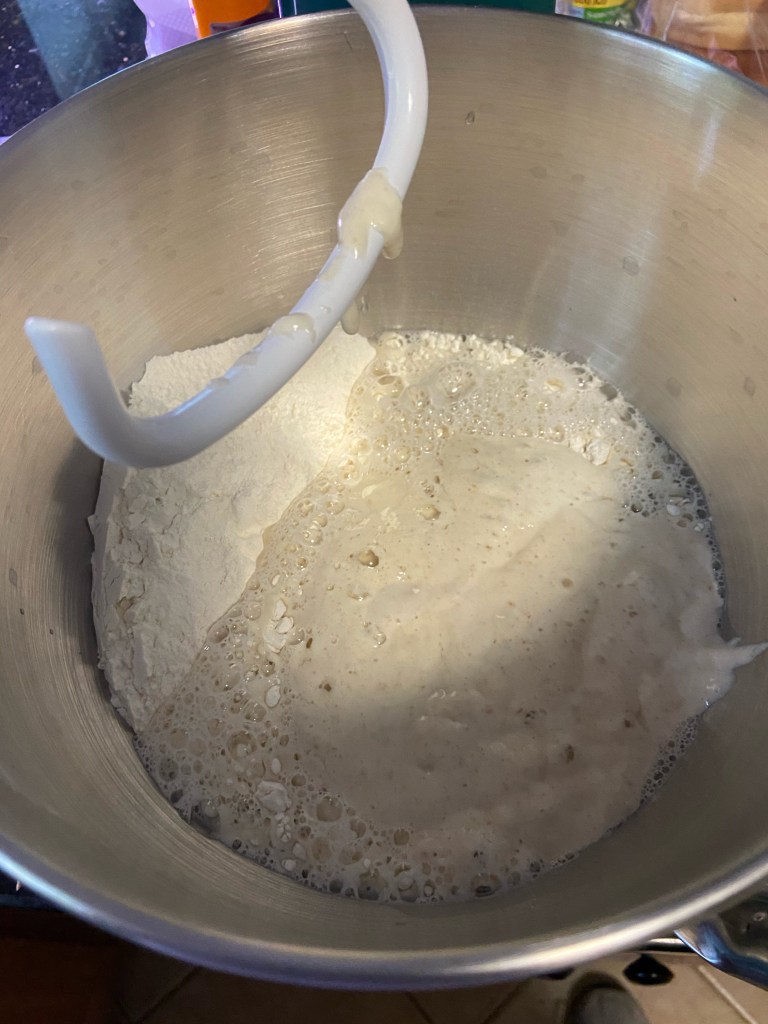
The ingredients in the stand mixer just waiting to go.
Silly me. I didn’t realize my mistake until I had started the mixer and saw a batter instead of a dough. A true “D’oh” moment! I did some quick math and figured that I needed to add 143g of flour to get it back to 70% hydration. I did that and turned the mixer back on.
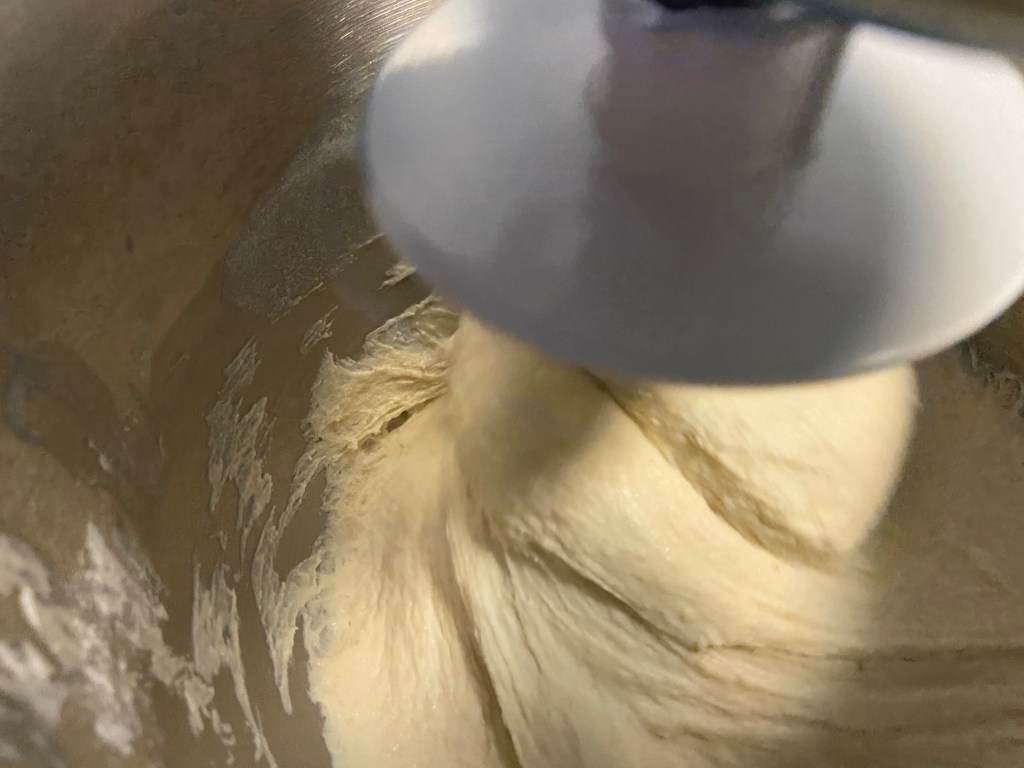
Kneading the dough after I fixed my mistake.
OK. Now it looks like a dough (I’ll spare you an image of what it looked like before I added more flour) and I let the mixer at it for 7 or 8 minutes. It’s a very soft dough, as you might imagine, and very sticky. Once it was done with the mixer I put it into an oiled bowl gave it a turn around, covered it with plastic wrap and am now letting it rest. In a few hours (I’m thinking 3 hours) I’ll shape it and put it in a proofing basket for a good night’s sleep in the fridge.
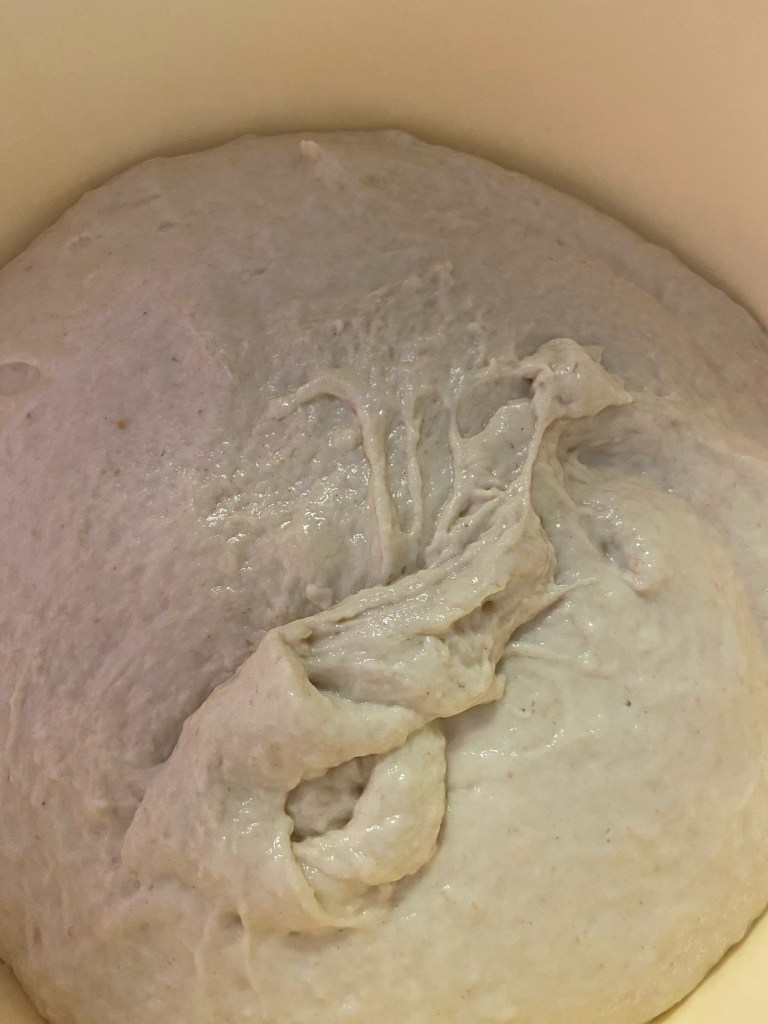
The dough is resting quietly in its bowl.
So this isn’t quite the experiment I had planned this morning (which probably means I’ll run the planned one tomorrow) but it should be interesting. The hydration is what I wanted I just don’t know if the 200g of starter is going to be enough to get me the results I want. I guess we’ll find out tomorrow. Stay tuned!


You must be logged in to post a comment.