Meet Covey – how I maintain my starter

Covey getting read for a feeding.

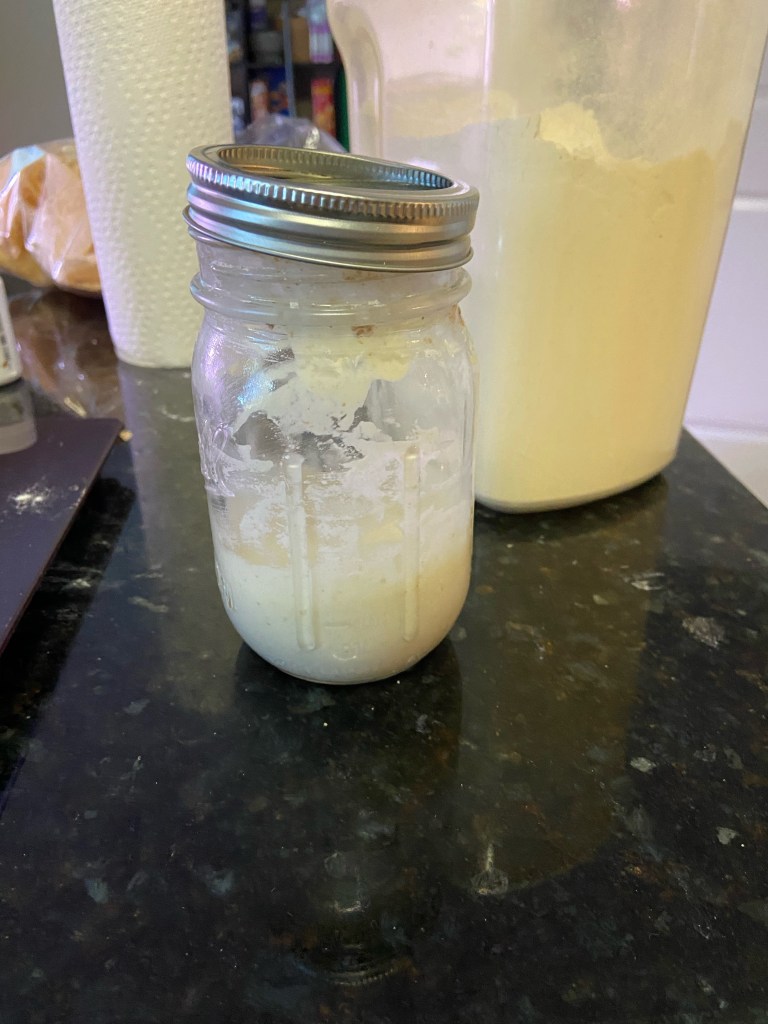
When I started down the road of my sourdough adventures I had decided to maintain it at a level so I could take enough off for the recipe I had that required the most starter – 454g. This meant that I was maintaining it at 600g no matter how much I used. In other words, every feeding I was giving Covey 200g of flour and, more often than not, I was throwing out 200g of flour every day. Given how hard it’s been to get flour (ignoring the monetary cost) this is hugely wasteful. Today I’m going to talk about how I changed my habits to waste less while still being able to make as much as I need.

First I realized that I wasn’t going to make that recipe that calls for 454g too often (it’s a nice recipe but there are recipes I like more.) I also realized that the “discard” is just starter that I could use to grow more so I would have enough for the recipe I needed. I figured that 300g of starter was pretty much the maximum I would need (I have one recipe I like that calls for 320g but I took that into account.) Based on that I decided to maintain Covey at a nice, svelte, 150g.

Every morning I slim Covey down to 50g and feed it 50g each of water and flour. If it’s a baking day I figure out how much starter I’m going to need and put 1/3 of that amount into a separate vessel to be the starter for the day’s baking.

The base for the starter for today’s baking. I need 200g of starter all told.

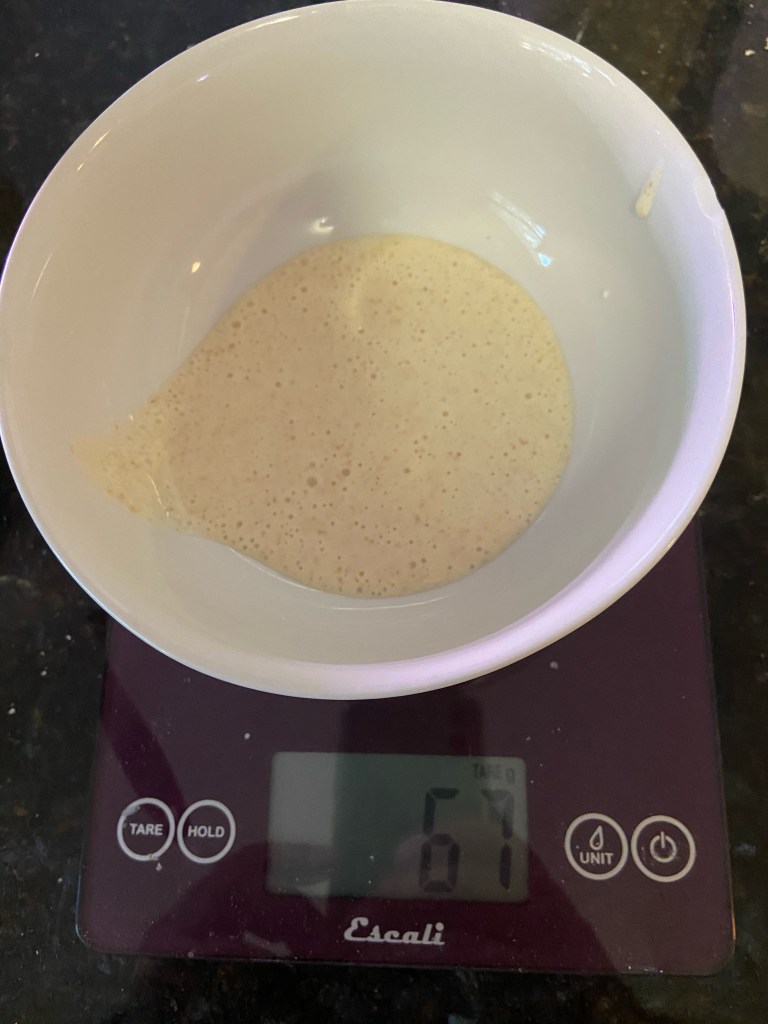
Today I’m going to try variation 2 on my first solo attempt which means I need 200g of starter. I took 67g from Covey and added to it 67g of flour and 67g of water. Essentially, I made Covey Jr. as a 201g starter taken from the original.

Covey Jr., 201g of starter that I’m going to use today.

So I started with 150g. I took 67g to make Covey Jr. Now I need to discard 33g to get down to the base 50g. I fed that 50g each of flour and water and ended up with 149g (a drop got left on the spoon I used to mix it and that’s fine.) Covey went back to his spot on the top of my fridge (not in it, on top of it) until it’s time to feed him in the morning.

Covey after feeding. The jar he lives in weighs 250g so today Covey weighed in at 149g after feeding.

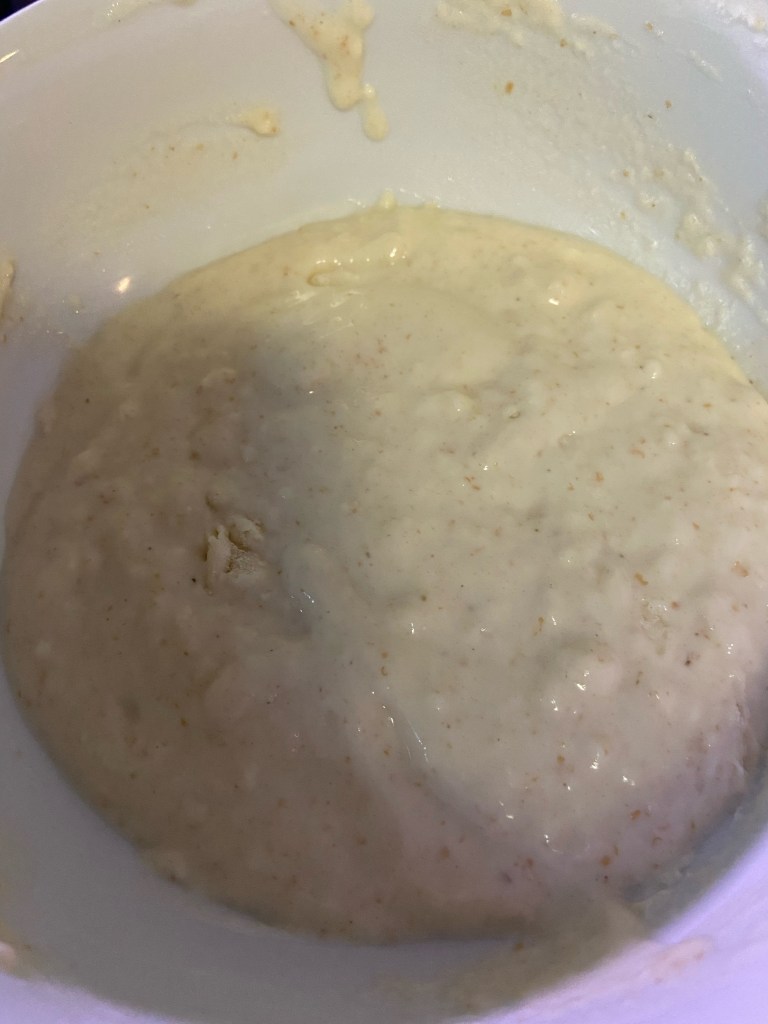
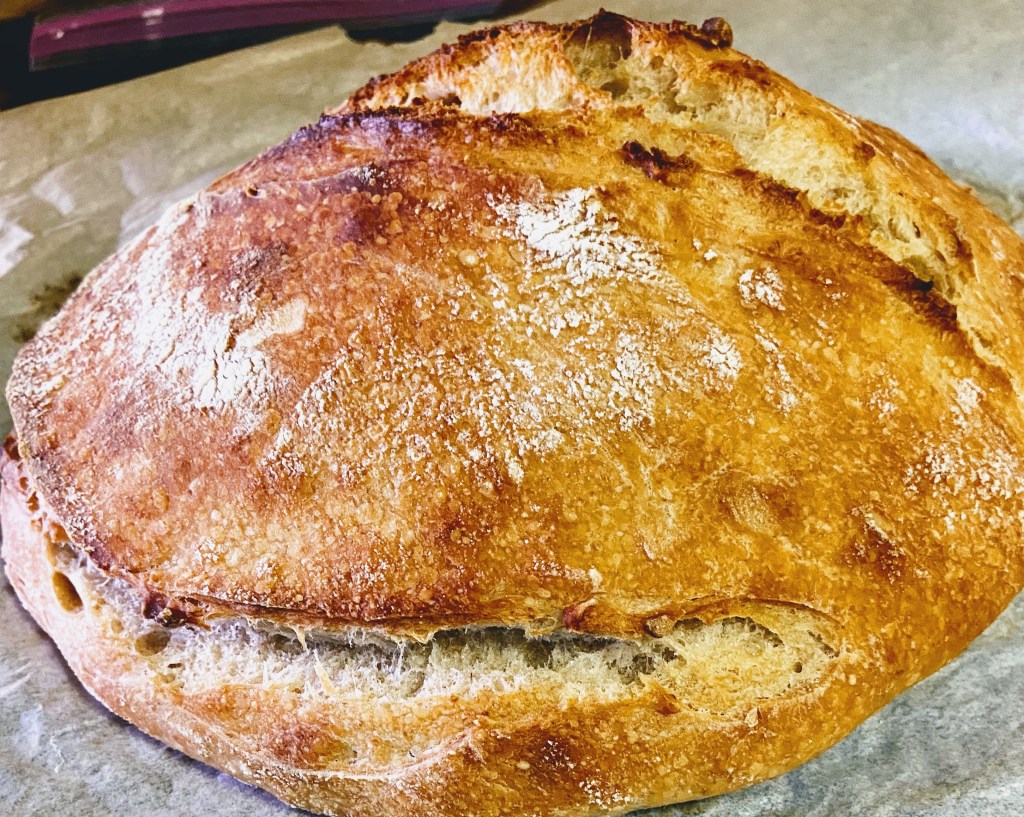
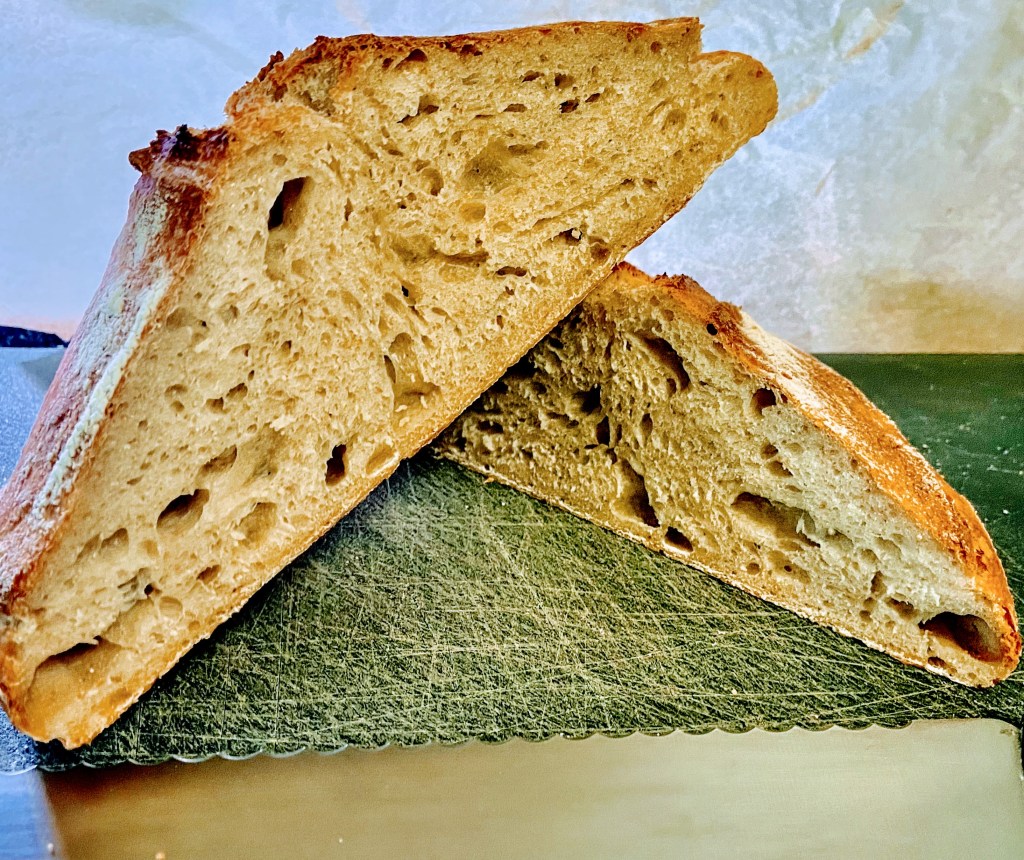
That’s it. I’ll let you know how Covey Jr. does in bread once he’s been baked. Long story short, keep your base starter small enough to minimize your discard but big enough to be able to make a starter for what ever you want to bake. Oh, and for that recipe that calls for 320g of starter – I just get my base down a bit below 150 and bulk it up with the next feeding.

My first solo attempt

Yesterday I decided that I was going to go out on my own. I was going to try baking without a net. Or without a recipe. I know what needs to go into bread. I know some ratios that work. I know basic procedures. I wanted to see if I could take the knowledge that I’ve gleaned and try to create something new. New to me at least.

The outcome of my first solo attempt

I decided that I was going to try a 70% hydration loaf. That is 10:7 ratio of flour to water. Since my starter is 100% hydration (equal parts flour and water) it wouldn’t be too hard to do the math. All told I’d need 700 grams (or cc or ml) of water for every kilogram of flour. Since 500g flour makes a reasonable sized loaf I’d start with that so as to minimize waste if it didn’t turn out well.

So… 500g flour means 350g water. I figured 12g salt would finish it out.

I started with 200g of my starter about 6 hours after its daily feeding and added 100g each of flour and water. (If you’re having trouble keeping track this is 200g of water and 200g of flour.) I let this rest for about an hour to become a levain.

I came back to my levain and I added the rest of the flour (300g) and water (150g), and let that sit for an hour to autolyse. After an hour I came back and folded the dough on top of itself. I repeated that 3 more times over the next 2 hours. Another hour to rest and I came back to the dough and I was pretty happy with how it looked. I took it out, folded it to gently deflate it and shaped it into a ball before plopping it in a proofing basket. The dough then went into the fridge to get a good night’s sleep.

Being the lazy person that I am I had my son take out the dough about an hour before I planned on coming downstairs and turn the oven to 450°F about 30 minutes later. (Knowing I couldn’t trust either of us to remember I put a baking pan in the oven before I went to bed. When I came down in the morning the dough was ready to go in the oven and the oven was ready for the dough. I boiled some water, put the dough out on a baking tray and scored it. Into the oven the dough went with the boiling water going into that very hot baking pan. 35 minutes later out came the bread.

Then came the hardest part of the whole exercise. I’m the kind of baker who wants to eat the bread when it’s hot out of the oven and the butter I slather onto it melts. But for this loaf I wanted to test this recipe. That meant I had to do it properly and wait for the bread to cool. So I waited as the bread sat on its cooling rack mocking me for about 2 hours.

The inside of the loaf.

I sliced into the bread and saw an uneven crumb with some big holes and some smaller ones. Not quite what I was going for but visual proof that I was on the right track. I had that first piece of the bread (yes, slathered with butter even though it didn’t melt) and I was reasonably happy with the flavor. It didn’t have an overly sour tang to it (one of the complaints I’ve gotten from family members) but I could tell it was a sourdough. It had the wonderful crust that I’ve come to expect (the difference removing fat and adding steam makes is huge!) from my sourdoughs. The texture was a bit denser than I might like but, overall I was happy with the first attempt.

The only thing I didn’t really like (and I’ve seen this with most of the no-knead recipes I’ve done) is that rather than rising in the oven it spreads out. I think that might be why so many of them suggest cooking in a Dutch oven. The recipes that call for kneading seem to do a better job of building up the gluten and helping the dough keep its shape and rise up and not out while cooking.

I think the next step in this recipe is to take the same quantities and go the old fashioned, kneaded dough route. I think I’ll start that tomorrow. Maybe I’ll do a post with the prep stages and some pictures as I go and then share the final product on Monday. Tune in tomorrow to find out.

Some inspiration I found in my searches…

So we’ve been stuck at home for the past 2 and half months with only ourselves for company. I decided that since I knew I was going to be home for a long time and not doing any travelling that this was the perfect time to birth a sourdough starter.

I went online. I searched. I googled. I youtubed. I found that there are tons of sites that say the same basic thing:

Take some flour. Take the same weight in water. Mix the 2. Wait a day. Add that same amount of each again and mix. Wait a day. Repeat. Toss 2/3 of what you have in the trash and feed what’s left with 1:1:1 ratio by weight (it you have 1lb of starter add in 1lb of flour and 1lb of water and mix.) Repeat the discard and feed daily.

(If you actually are maintaining 3lbs of starter and do not run a commercial bakery you might have a problem but that’s a topic for another post.)

So I started with 50g (yes I use metric, live with it) each of flour and water. I built it up to 300g of starter over the course of 3 days. I started the discard and feeding schedule. At some point I decided it was ready to bake with. I’m a coward so I went with the tried and true, I went to King Arthur Flour’s website and used this recipe. It came out really nice and since it uses commercial yeast as well it had a nice rise to it.

At this point I decided it was time to get more serious, to give Covey (that’s my starter’s name) a real workout. I’d checked this recipe out (thanks Karen for sending me that link!) and felt it was easy enough for me to do with a reasonable chance of success. The bread came otu delicious but every time I make that recipe it cracks at the bottom. I’m not giving up, I’ll try some more!

The last place I’m going to share that gave me inspiration is this recipe for sourdough croissants. I’m sharing that recipe because it’s cool and the failures I had the one time I attempted it were on me and not on the recipe. (I still have a bunch of the delicious croissants in the freezer – my failures were in shaping and sizing them.) I’ve used a bunch of her other recipes and it’s a site I reccomend.

That’s all right now for places I’ve gone for recipes and inspiration. I might do another one of these posts later on and if a recipe I’m making and sharing is inspired by something I’ll be sure to include that. Happy baking!

About me

Hi. I’ve been kicking around kitchens since I was a kid. I was underfoot in my parents’ tiny kitchen in NYC for as long as I can remember. I went to culinary school. I’ve cooked in restaurants and I’ve cooked in hotels. About 15 years ago I decided that as much as I loved cooking I needed to do something that would pay better. I went into software development (to be honest the professional cooking was a break between software jobs so it wasn’t a huge stretch.) But I’ve always loved cooking and baking.

I’ve cooked Mexican food and Italian food. I’ve kicked the tires on Morrocan food. I’ve made felafel, kebab, and other staples of the Israeli/Lebanese/Palestinian kitchen. But my true love is bread.

I’m starting this blog for me. If you read it and enjoy it that’s great but I’m starting it for me. It’s a place for me to document my baking experiments. It’s somewhere I can share my successes and failures and hopefully learn from my mistakes. The goal at the end of the day is to come up with some easy and amazing recipes so I can keep fresh bread on the table.